Installing Debian 12 (codenamed Bookworm) is an excellent choice for several reasons, especially if you're looking for a robust, secure, and flexible operating system.
Here are the main reasons to install Debian 12:
- Proven stability
• Debian is renowned for its stability: Each version is rigorously tested before release, making it ideal for critical environments such as servers and workstations.
• Debian 12 inherits this tradition with additional improvements and updates.
- Updated software
• Latest packages: Debian 12 includes updated versions of software such as GNOME 43, KDE Plasma 5.27, and a Linux 6.1 LTS (long-term support) kernel.
• Compatible with modern development, productivity, and entertainment tools.
- Security and long-term support
• Debian has a team dedicated to quickly resolving vulnerabilities.
• You'll receive security updates for years thanks to long-term support.
- Great versatility
• Different uses:
• Personal desk.
• Servers.
• IoT and embedded systems.
• You can customize it to suit your needs, either by installing a complete graphical environment or a minimalist system.
- Community and documentation
• Debian has an active global community that offers free support on forums, mailing lists, and chats.
• Its official documentation is extensive and available in several languages, including Spanish.
- 100% free (but flexible) software
• Strictly complies with free software guidelines, but allows you to install non-free software (such as proprietary drivers) if needed.
- Graphical environment options and lightweight systems
• You can choose between graphical environments such as:
• GNOME (modern and complete).
• KDE Plasma (customizable and powerful).
• XFCE MATE and LXQt (lightweight for older hardware).
- Efficiency on older or modern hardware
• Debian 12 is suitable for new hardware, but is also lightweight and runs very well on older computers.
- It's free and open source
• You can download, use, and share it at no cost, with full access to the source code.
Why choose Debian 12 over other distributions?
• Extreme stability: More reliable than newer, more experimental distributions.
• A universal system: It can be used on servers, desktops, and embedded devices.
• Total control: You can customize every aspect of the system.
Now we will move on to documenting the installation of Debian Linux 12.x by creating an easy-to-understand summary guide.
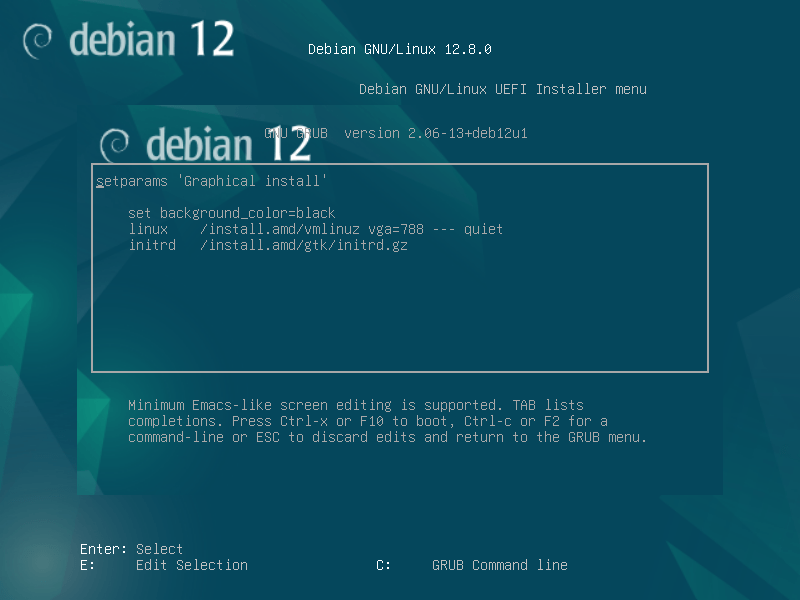
Detail of the Debian Linux installer.
- Boot from USB or ISO
• When booting from the USB, you will see a menu with options such as:
• Install: Installation in text mode.
Text mode installation
The Debian text-mode installation is a simple and lightweight way to install the operating system, designed for environments where a graphical interface is not needed or where the hardware does not support advanced graphics well.

Graphical Install: Graphical installation (recommended for new users).
The option Graphical Install The Debian Installer provides a user-friendly visual environment for installing the operating system, designed specifically for users who prefer a more intuitive experience compared to text mode. This method uses a window-based graphical interface that guides the user through the installation process more comfortably.
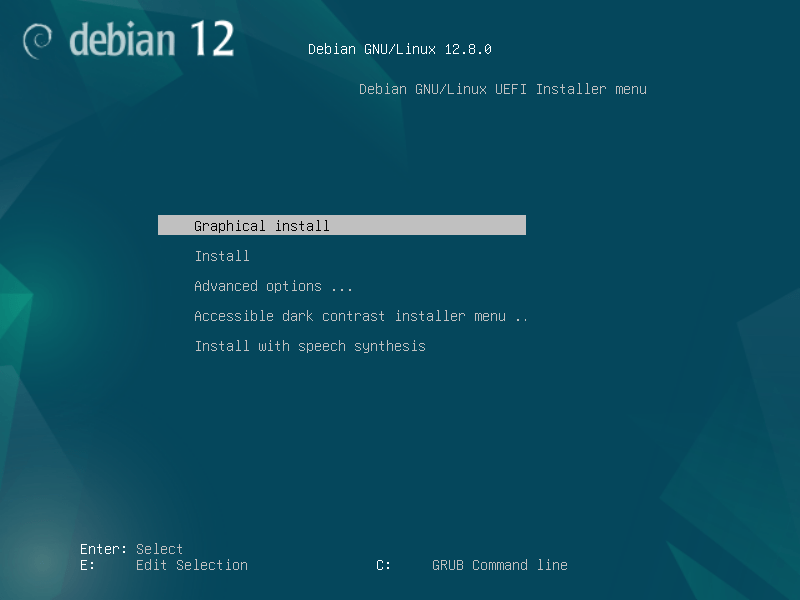
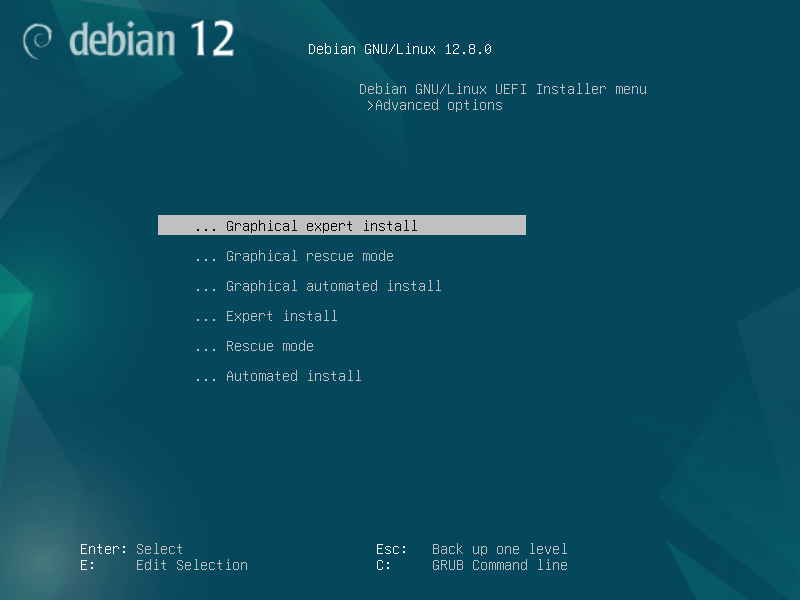
Advanced Options, Install with speech synthesis, etc.
In the Debian installation menu, the option Advanced Options (Advanced Options) offers additional settings for users who need to customize or adjust specific aspects of their installation. This menu is primarily designed for more experienced users or for cases where the standard installation isn't sufficient.
What can you find in “Advanced Options”?
- Expert Mode (Expert Install)
- It offers detailed control over all installation steps, including advanced hardware configurations, partitioning, networking, and more.
- Ideal for advanced users who want to customize all aspects of the installation.
- Rescue Mode
- Allows you to repair an installed Debian system that won't boot or is experiencing problems.
- It gives you access to tools to recover data, reinstall the boot loader (GRUB), or troubleshoot system errors.
- Automatic Mode (Automated Install)
- Performs a preconfigured installation based on a custom configuration file.
- Useful for deploying Debian to multiple computers with the same parameters.
- Safe Mode Installation (Graphical Expert Install)
- Similar to expert mode, but with a graphical interface for greater ease.
- Loading additional drivers (Load Installer Components)
- Allows you to add additional modules to the installer, such as specific hardware drivers.
- Installation with UEFI or Legacy compatibility
- Settings for installations on systems with traditional BIOS or UEFI.
- Custom kernel configurations
- Options to load specific kernel versions or advanced parameters.
When to use Advanced Options?
- If you have problems with the standard installation (for example, hardware not detected correctly).
- When you need to configure complex networks, advanced partitioning, or install Debian on unusual hardware.
- If you want to rescue or repair an already installed system.
- To perform automated installations or with specific configurations for business environments.
Accessible Dark Contrast Installer Menu
The Accessible Dark Contrast Installer Menu is an option in the Debian installer designed to improve visual accessibility by providing a high-contrast, dark-toned color scheme. It is intended to make the menu easier to read and navigate for people with low vision or sensitivity to bright light.

Install with Speech Synthesis
The option «Install with Speech Synthesis» (Install with Speech Synthesis) in the Debian installer is designed to make the installation process easier for people with visual impairments or users who prefer hearing assistance. This feature uses a speech synthesizer to narrate the options and guide the user through the installation.
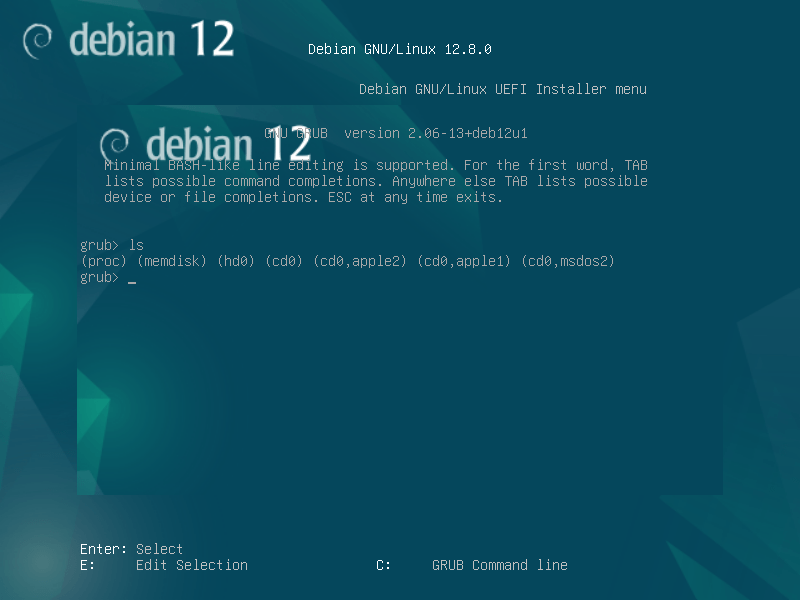
GRUB Command Line
He GRUB (GRand Unified Bootloader) is the boot loader used by Debian and many other Linux distributions. If your system boots to the GRUB command line instead of the usual menu, it may be due to a problem with the bootloader configuration or system files.
What is the GRUB Command Line?
The GRUB command line allows you to perform advanced tasks such as:
- Manually start an operating system.
- Repair boot configurations.
- Test kernel parameters.
E: Edit Selection
The option «E» in the Debian installer boot menu allows you to edit kernel boot options before starting the installer. This is especially useful for configuring additional kernel parameters or troubleshooting specific hardware issues.
When to Use Option “E”?
- Configure Kernel Options:
- Add custom parameters, such as disabling problematic drivers or adjusting specific hardware settings.
- Troubleshooting Boot Problems:
- For example, if the system does not properly recognize a network device or experiences hardware errors upon startup.
- Configure Advanced Options:
- Enable modes such as “rescue” or debugging settings.
We begin the installation of Debian Linux on our computer:
Select Graphical Install.
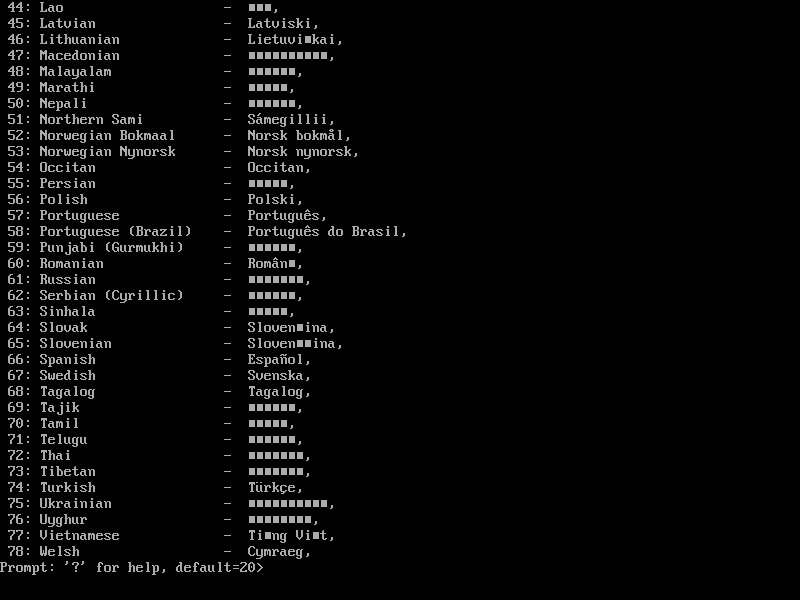
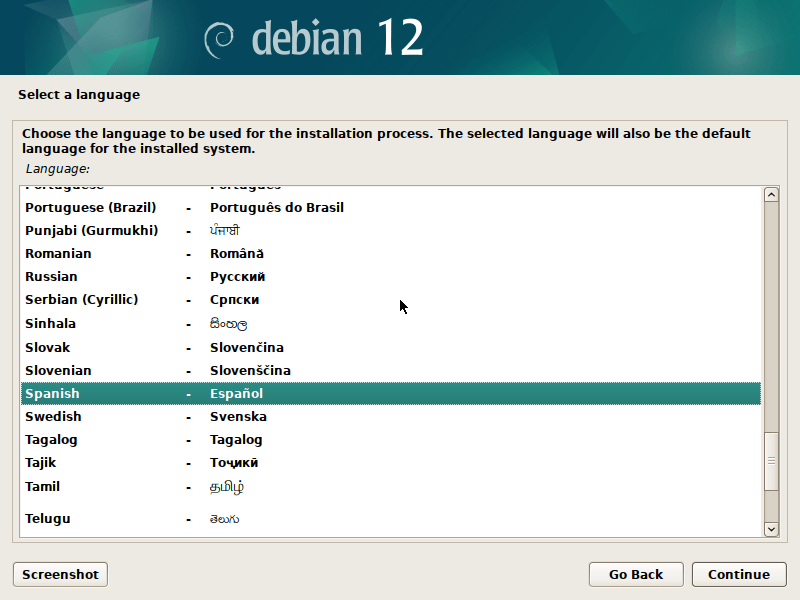
Language Selection
A screen will ask you to choose your preferred language. Example: Spanish.
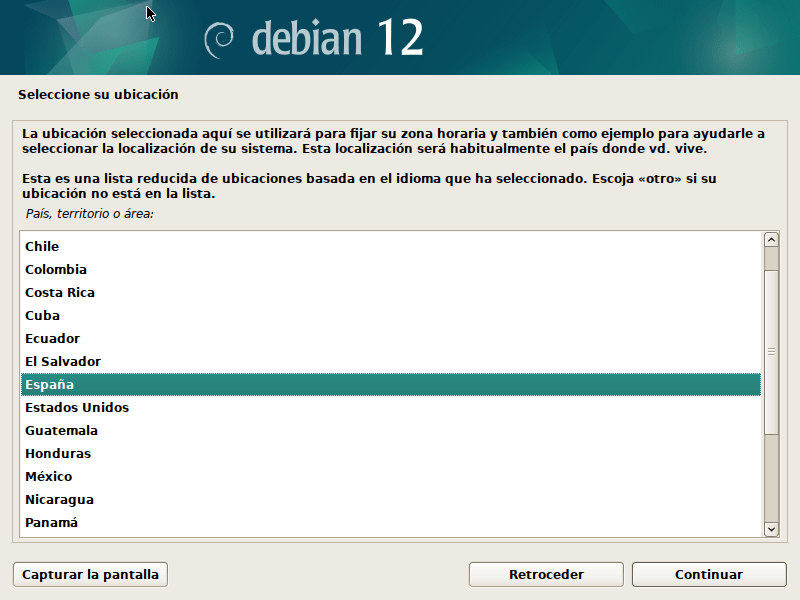
Time Zone Settings
• Select your location to set the local time.
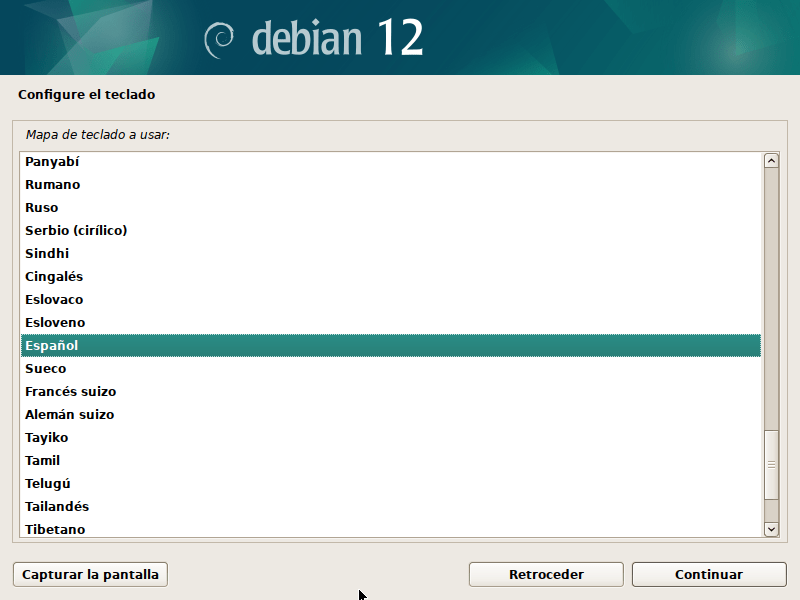
Keyboard Configuration
• Select your keyboard layout, such as “Spanish” or “Latin American” or “Portuguese” or “English.”
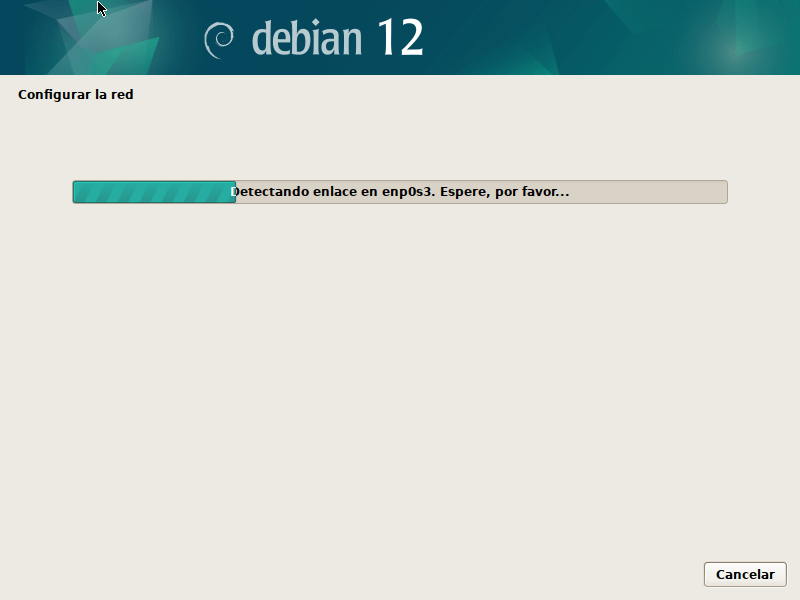
Network Hardware Detection
• The installer will search for network devices to connect to the Internet…
• If necessary, you can configure Wi-Fi by entering the key, or configure an Ethernet network or the network via your Android smartphone as a portable hotspot or USB tethering in case of problems with the network drivers.
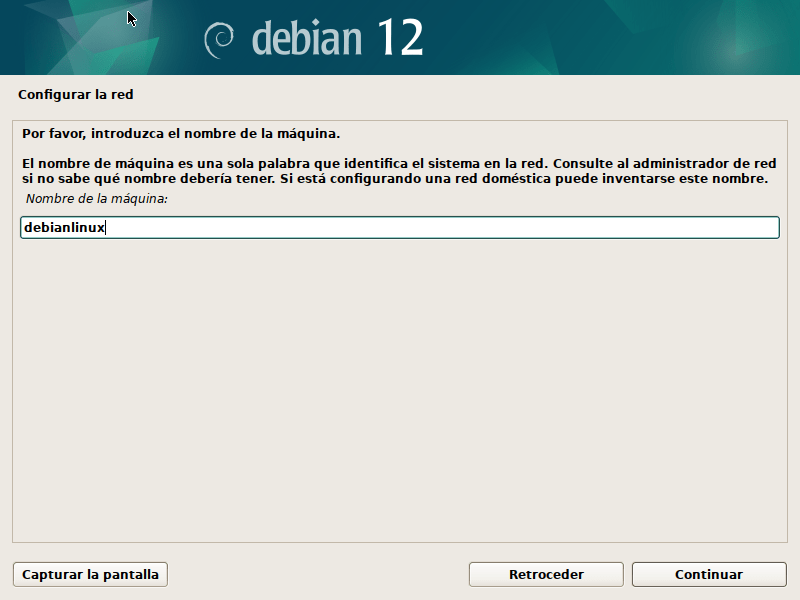
Setting the System Name
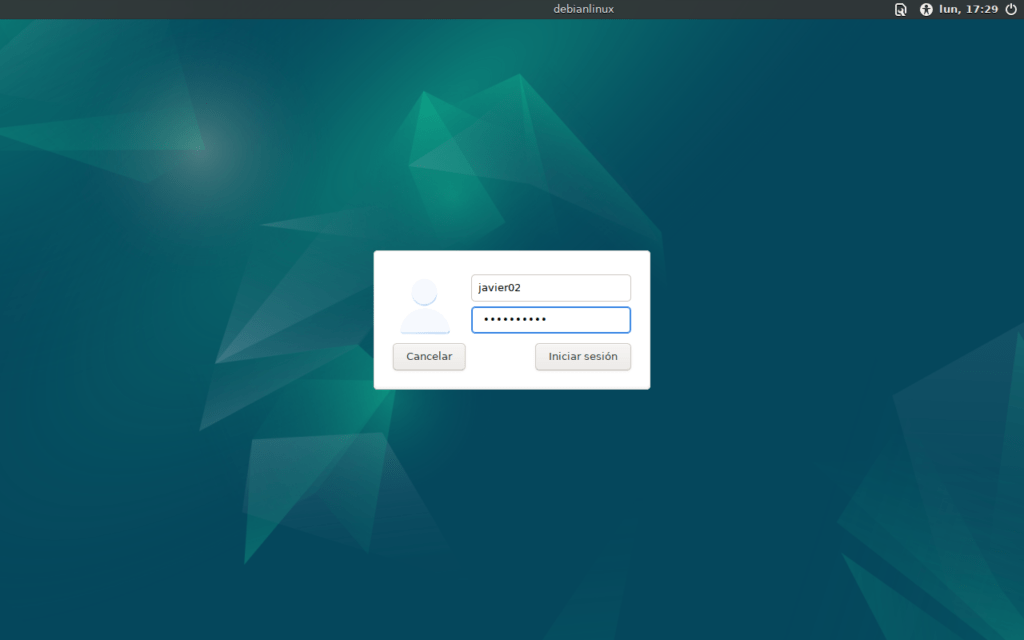
• Enter a name for your computer (hostname), such as “debianlinux.”
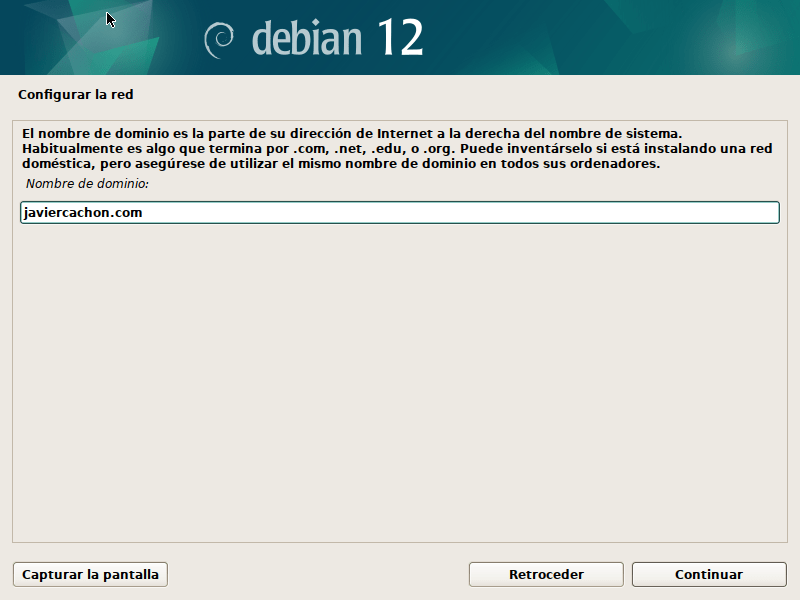
Setting Up a Domain Name in Debian
The domain name is used to identify the network or subnet to which your system belongs, especially useful in server or local network configurations.
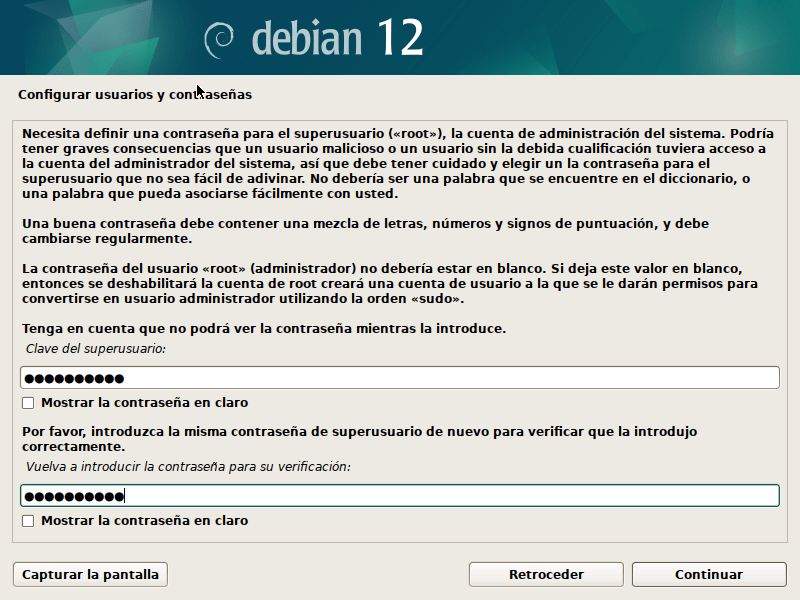
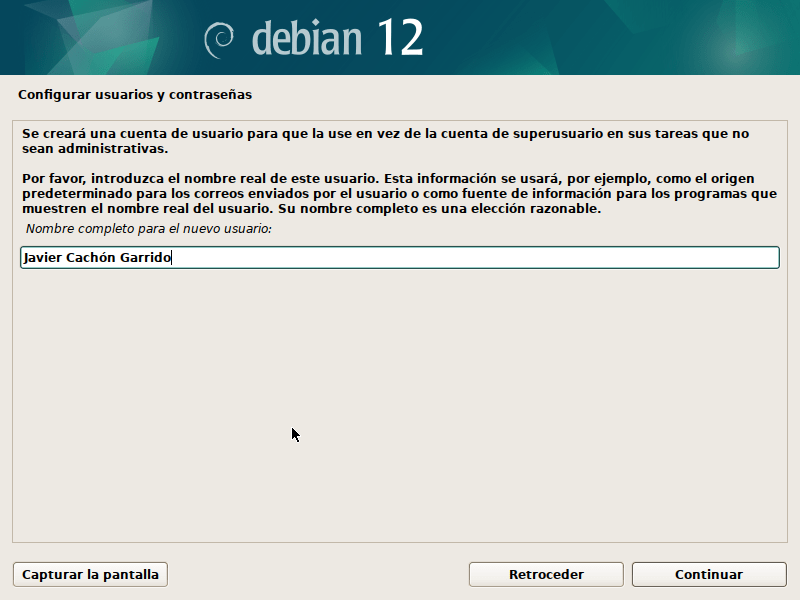
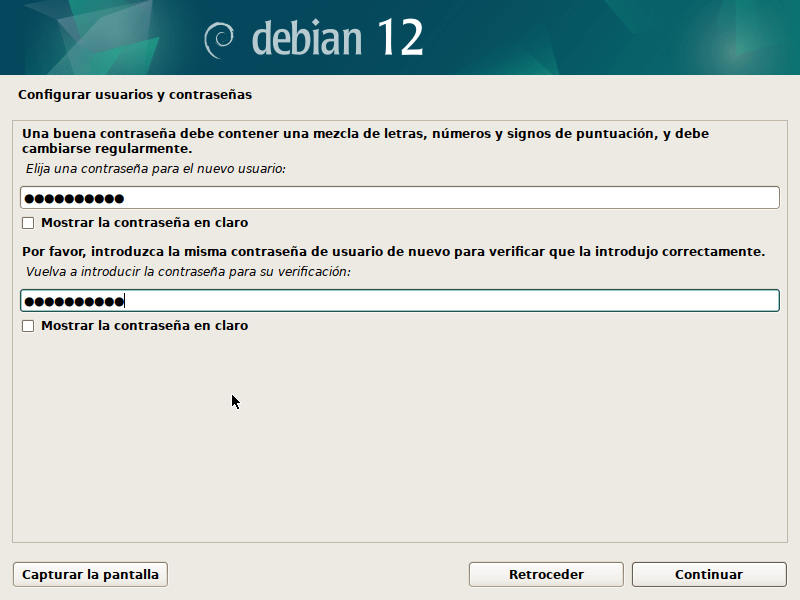
Username and Password Configuration for Debian Installation
During the Debian installation process, setting up a username and password is a crucial step to ensure system security and customization.
Steps to Configure Username and Password
- Root User Password (Optional):
- If you decide to enable the user root (administrator), the installer will ask you to set a password for this user.
- Enter a strong and easy-to-remember password. If you prefer not to enable root, you can leave this step empty and continue. The system will grant administrator permissions to the first user created with
sudo.
- Create the Regular User:
- The installer will prompt you to create a user for daily use of the system.
- Details that will be asked of you:
- Full name:
For example, "Javier Cachón Garrido." - User name:
Typically, the system will suggest one based on the full name, such asjavier02. You can modify it if you wish. - User password:
Enter a secure password that will be used to log in. Make sure you remember it.
- Full name:
- Password Confirmation:
- You will need to enter the password again to confirm that it is entered correctly.
Recommendations for a Secure Configuration
- Password Length:
Use passwords of at least 8 characters that include uppercase, lowercase, numbers, and symbols. - Administrative Users vs. Regular Users:
- Use the user root only when strictly necessary for administrative tasks.
- Perform daily work with the regular user, elevating permissions only when necessary by
sudo.

Setting the Clock and Time Zone in Debian
Correct time and time zone settings are essential to ensure proper system operation, especially for tasks such as scheduling cron jobs, network synchronization, and logging.

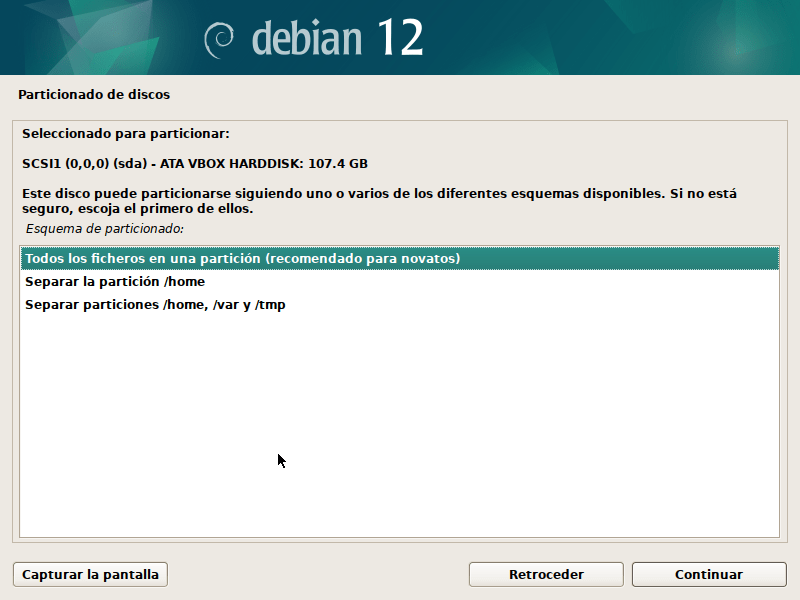
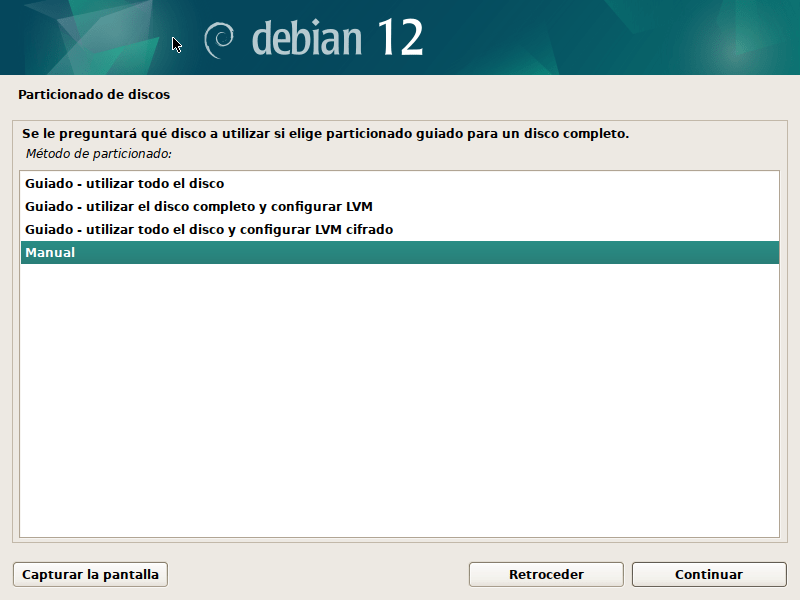
Disk Partitioning in the Debian Installer
The Debian installer offers several disk partitioning options, depending on your needs and experience level. These options are presented during the installation, and I'll explain how to use them here.
• The installer offers several options:
• Guided: Recommended for beginners (you can use the entire disc).
Guided Partitioning in Debian
He guided partitioning It's an easy and recommended option during Debian installation for users who are inexperienced with partitions or prefer to have the installer automatically configure the disk. This method ensures that the partitions are optimally organized for a functional Debian system.


Guided Partitioning Options
When you select Guided Mode, the installer presents you with several options for partitioning your disk. The most common are:
- Use the entire disk
- The installer erases all contents of the disk and configures it exclusively for Debian.
- Ideal if you don't need to keep previous data or operating systems.
- Use the entire disk with a separate partition for /home
- Similar to the previous option, but creates a separate partition for the directory
/home. - Advantage: Facilitates updating or reinstalling the system without losing user data.
- Similar to the previous option, but creates a separate partition for the directory
- Use the entire disk with separate partitions for /home, /var, and /tmp
- Divide the disk into several partitions specific to each component:
/home: User files./var: Variable files such as logs./tmp: Temporary files.
- Advantage: Improves organization and can protect the system in case of partition errors.
- Divide the disk into several partitions specific to each component:
- Guided with LVM (Logical Volume Manager)
- Use LVM to manage partitions flexibly.
- Advantage: Allows easy resizing of partitions in the future.
- Guided with disk encryption
- Protects data on disk using encryption.
- Requires entering a password at system startup.
LVM Partitioning and LVM Encryption in Debian
LVM (Logical Volume Manager) allows you to manage partitions more flexibly, making it easier to resize, create, and delete logical volumes. If you also want to protect your data, you can use Encrypted LVM, which adds a layer of security by encrypting partitions.
Advantages of LVM
- Flexibility:
- Resize partitions without rebooting.
- Create multiple logical volumes on the same volume group.
- Space Management:
- Combines multiple physical disks into a single volume group.
- Security (with encryption):
- Data is automatically encrypted before being written to disk, protecting your information in the event of disk loss or theft.
LVM in the Debian Installer
- Select LVM:
- During partitioning, choose Guided Partitioning → Configure LVM.
- The installer will automatically guide you through the creation of a volume group and logical volumes.
- Create Logical Volumes:
- After setting up the volume group, divide the space into logical volumes:
- / (root): Contains the operating system.
- /home: For personal data.
- swap: For memory swapping.
- After setting up the volume group, divide the space into logical volumes:
LVM Encryption in Debian
Encrypted partitioning uses dm-crypt and LUKS (Linux Unified Key Setup) to encrypt logical volumes. Here's how to set it up:
- Select LVM Encryption:
- During partitioning, select Guided Partitioning → Configure Encrypted LVM.
- Choose the Partition to Encrypt:
- Choose the physical partition that will be encrypted and used for the LVM volume group.
- Set the Encryption Key:
- The installer will prompt you for a secure encryption password. This password will be required to unlock the partition on every boot.
- Create the Group and Logical Volumes:
- Just like in regular LVM, define logical volumes for
/,/home,swap, etc.
- Just like in regular LVM, define logical volumes for
Key Differences Between LVM and LVM Encryption
| Feature | LVM | LVM Encryption |
|---|---|---|
| Flexibility | High | High |
| Data Protection | Not encrypted | Fully encrypted data |
| Performance | Better (without encryption) | Slight reduction (by encryption) |
| Security | Without extra protection | Protection in case of theft |
| Key Requirements | No | Yes, at every system startup |
Recommendations
- Use Normal LVM:
- If you need flexibility and aren't worried about extra security.
- Use LVM Encryption:
- Ideal for laptops, external drives or servers with sensitive data.
- Secure Password:
- On encrypted LVM, use a strong password to maximize security.
- Backup:
- Make sure you have backups, as losing the encryption key can mean total data loss.
Both approaches have advantages depending on your needs. LVM is ideal for dynamically managing partitions, while encrypted LVM combines that flexibility with robust data protection.
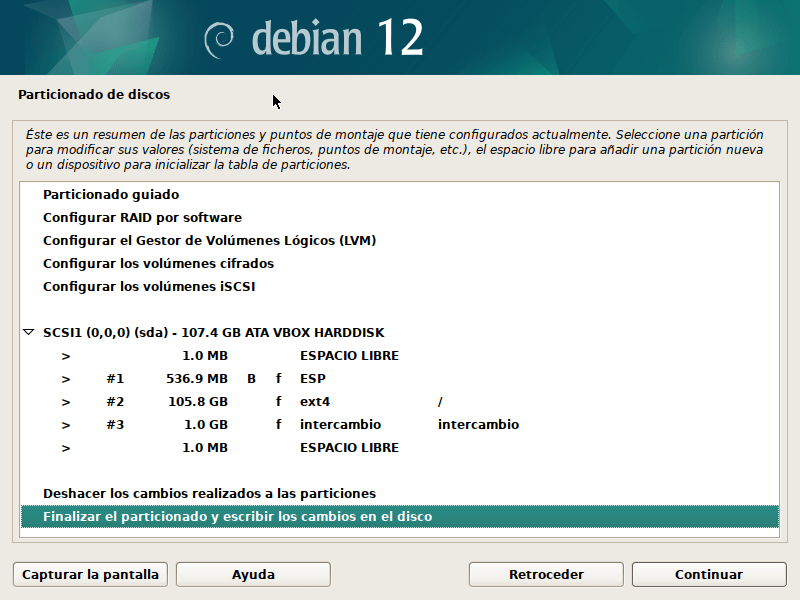
This is the result of the guided partitioning, we click Finish partitioning and write the changes to the disk.
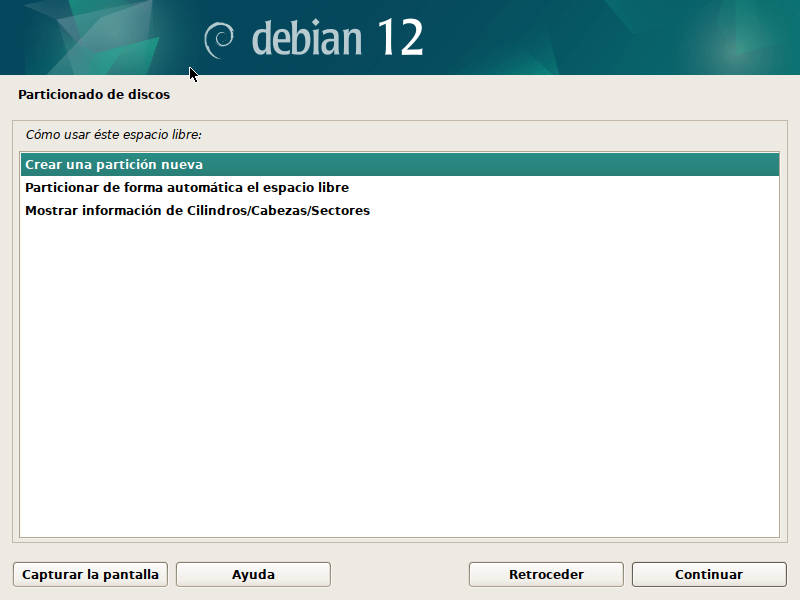
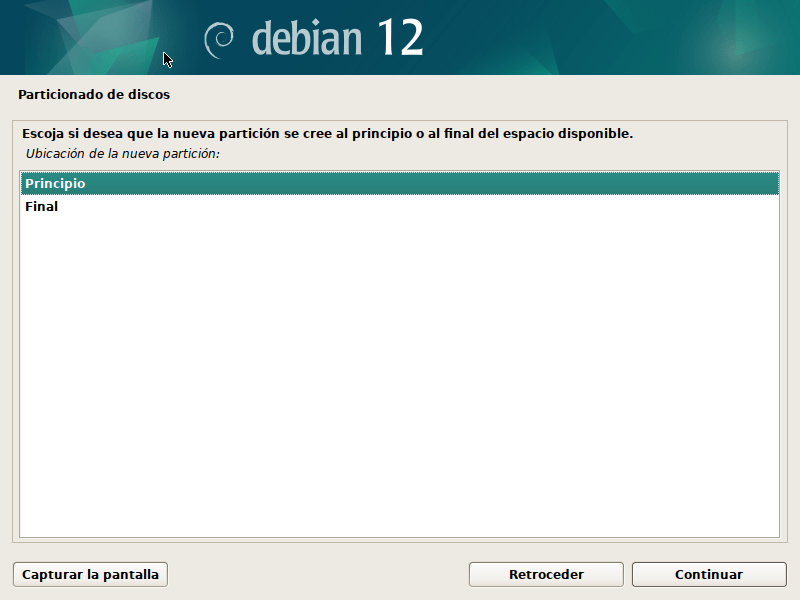
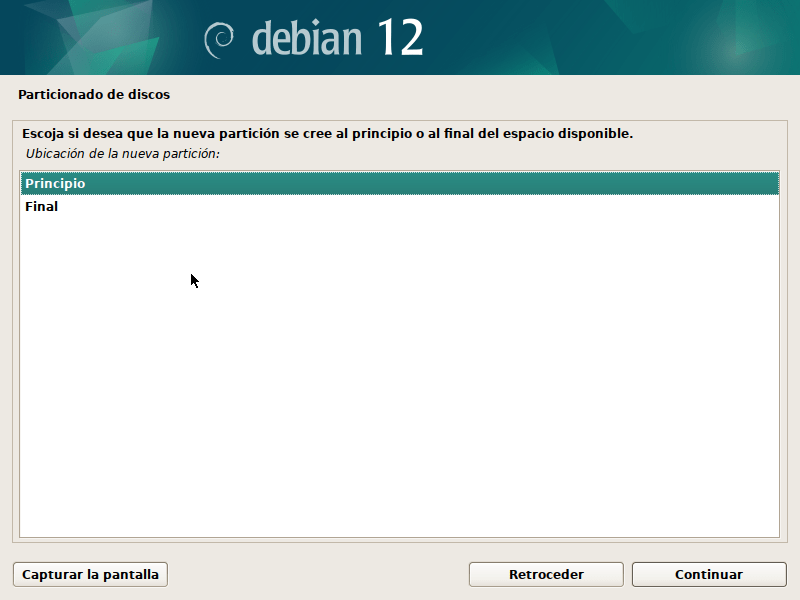
Manual Partitioning: For advanced users who want to partition in a custom way.
He manual partitioning is an advanced option in the Debian installer that allows users to fully customize how partitions are laid out and configured on the disk. This method is ideal if you need full control over the partitioning scheme, are installing Debian alongside other operating systems, or have specific requirements.
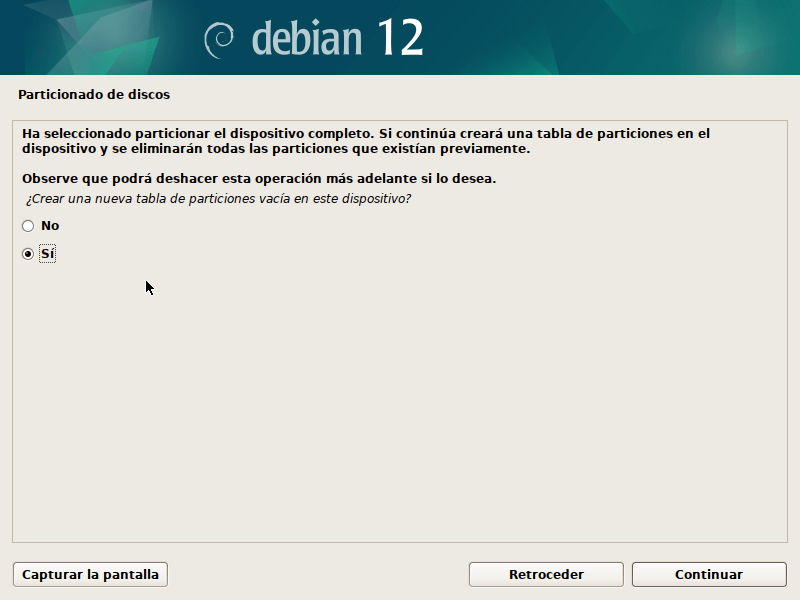
We choose to partition the entire empty hard drive:

Creating table schemas in partitions in GPT and MBR
The two main partition table schemes you can use when setting up a disk are:
1. GPT (GUID Partition Table)
Characteristics:
- It is the modern and recommended scheme for most systems.
- Supports disks larger than 2 TB.
- Allows up to 128 primary partitions (without the need for extended or logical partitions).
- It uses a redundant table (backup) at the beginning and end of the disk, making it more robust against errors.
- It is compatible with systems that use UEFI for the start.
Advantages:
- More reliable due to redundancies.
- Required for UEFI systems.
- Support for large discs.
Disadvantages:
- Older systems with traditional BIOS may not be supported.
2. MBR (Master Boot Record)
Characteristics:
- It is the traditional and oldest scheme.
- Supports discs up to 2 TB.
- Allows only 4 primary partitions, but you can create extended partitions to add more logical partitions.
- It is compatible with most older systems.
Advantages:
- Compatible with older BIOS.
- Simple for small drives and basic configurations.
Disadvantages:
- Strict limits on disk size and number of partitions.
- It has no partition table redundancy.
When to use each one?
| Condition | Recommendation |
|---|---|
| Disk larger than 2 TB | GPT |
| Boot in UEFI mode | GPT |
| Old operating system or BIOS | MBR |
| Wide compatibility required | MBR |
Let's partition the hard drive with the file format EXT4 which I consider perfect for a home user, and for companies the file format would be XFS, BTRFS etc
Ext4: File System in Linux
Ext4 (Fourth Extended Filesystem) It is the most widely used file system in modern Linux distributions, such as Debian. It is the evolution of Ext3, with significant improvements in performance, capacity and stability.
Ext4 Features
- Compatibility:
- It is backward compatible with Ext3, allowing Ext3 partitions to be mounted as Ext4.
- You can also convert an Ext3 system to Ext4 without formatting.
- Improved performance:
- Delayed allocation: Optimizes data writing to disk, improving speed and reducing fragmentation.
- Extents: Groups contiguous blocks of data together to reduce fragmentation and improve reading and writing.
- Support for large volumes:
- Maximum file system size: 1 exabyte (theoretical).
- Maximum file size: 16 terabytes.
- Faster file system check:
- It uses a design that reduces the time required to verify file system integrity after an unexpected shutdown.
- Journal (registry):
- Like Ext3, it uses a log to track changes to the file system, reducing the risk of data corruption in the event of a crash.
Advantages of Using Ext4
- Reliability: Ideal for servers and workstations thanks to its resistance to errors.
- Universal compatibility: Supported by almost all Linux distributions.
- Good performance: Suitable for both hard disk drives (HDD) and solid state drives (SSD).
- Low maintenance: Requires little user intervention to function optimally.
When to Use Ext4
- Daily use on personal equipment: Perfect for general Linux operating systems like Debian, Ubuntu or Fedora.
- Servers: Suitable for small and medium-sized servers without special requirements for advanced file systems.
- Simplicity: If you do not need specific features of other file systems like Btrfs or XFS.
Partitioning Scheme
Here is a partitioning scheme that includes the partitions swap, EFI, /boot, /root and /home, all configured correctly to install Debian with the file system ext4.
| Partition | Suggested Size | Mount Point | File System | Purpose |
|---|---|---|---|---|
| EFI | 300-500 MB | /boot/efi | FAT32 | Required for UEFI systems. |
| /boot | 512 MB – 1 GB | /boot | ext4 | Boot files, including GRUB. |
| swap | Equal to 1.5x RAM | (None) | swap | Virtual memory for swapping. |
| / | 20-50 GB | / | ext4 | Root system, includes all files. |
| /home | Rest of the album | /home | ext4 | Stores user data and settings. |
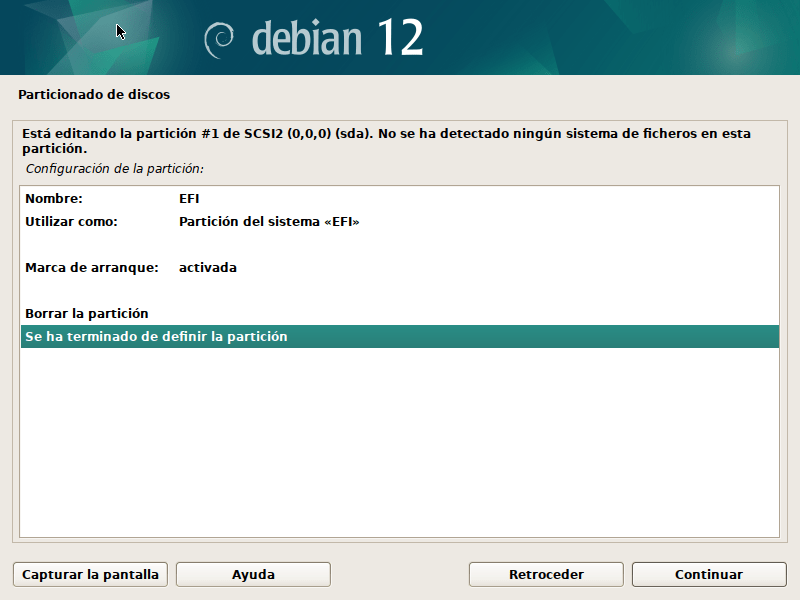
Let's create the fat32 EFI partition for UEFI systems with GPT:
What is EFI Partition?
The EFI partition (EFI System Partition, ESP) is a special partition used in systems that use firmware UEFI (Unified Extensible Firmware Interface) to boot the operating system. This is one of the key differences between UEFI systems and older systems that use BIOS.
EFI Partition Functions
- Storing boot files:
- Contains the boot loaders (such as GRUB or the Windows loader itself).
- Saves firmware-specific boot applications.
- Support for multiple operating systems:
- In dual or multi-boot systems, each operating system can install its boot loader on this partition.
- UEFI Firmware Management:
- UEFI loads the boot loader from this partition, rather than relying on a boot sector as in the BIOS/MBR scheme.
Technical Characteristics
- File System: FAT32. This is a requirement for the UEFI firmware to be able to read files.
- Recommended Size:
- Generally between 300 MB and 500 MB is enough.
- On systems with many operating systems or advanced configurations, it may be larger.
- Mount Point in Linux:
/boot/efi.
When Do You Need an EFI Partition?
- UEFI system:
- If your computer uses UEFI instead of BIOS, you'll need this partition to boot the operating system.
- Dual/Multi-Boot:
- The EFI partition is shared by all operating systems installed on the same disk.
- UEFI support:
- It is mandatory for modern systems that use GPT as a partition scheme.
Differences between BIOS and UEFI
| Aspect | BIOS (MBR) | UEFI (GPT) |
|---|---|---|
| Boot storage | Boot sector (MBR) | EFI Partition (FAT32) |
| Number of partitions | Maximum 4 primaries | Up to 128 partitions |
| Maximum disk size | 2 TB | More than 2 TB |
How to Create an EFI Partition in Debian
During the Debian installation, if you're using UEFI, the installer will automatically detect the need for an EFI partition. If you're partitioning manually:
- Create a new partition 300-500 MB.
- Maps the file system to FAT32.
- Set the mount point as
/boot/efi.

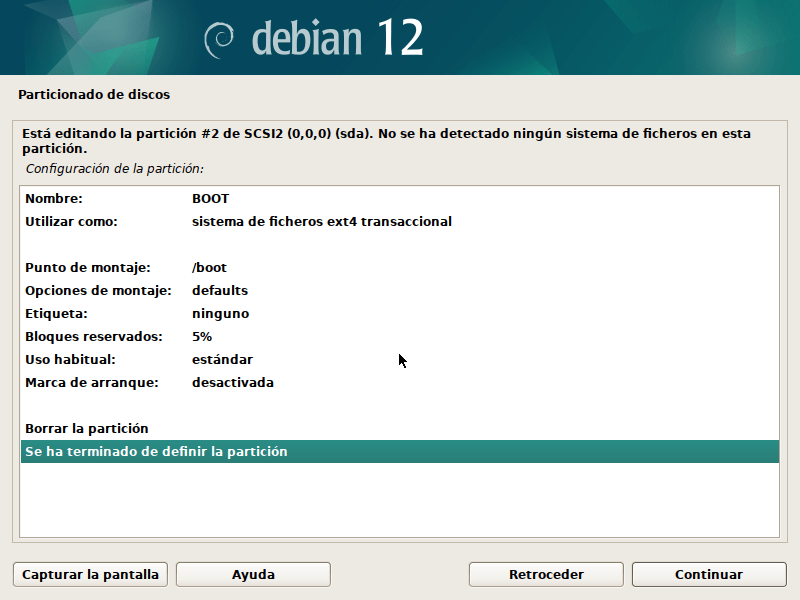
Let's create the /boot partition with ext4 file system
What is the /boot partition in Linux?
The partition /boot It is a dedicated area of the disk where the files necessary to boot the Linux operating system are stored. It's especially useful in specific configurations, although not always required.
What Does the /boot Partition Contain?
Inside the partition /boot There are essential files for the boot process, such as:
- Linux Kernel (
vmlinuz-*): The core of the operating system. - Initramfs file (
initrd.img-*): An initial system image that is used during boot to load necessary modules before mounting the root filesystem. - Bootloader: Depending on the system, includes GRUB files (
grub.cfg, modules, themes, etc.).
When Do You Need a /boot Partition?
- Using encryption or LVM:
- If the disk is encrypted or the system uses LVM, the boot loader may need a partition
/bootseparate to access the boot files.
- If the disk is encrypted or the system uses LVM, the boot loader may need a partition
- Systems with UEFI:
- Although not always necessary, a partition can be used
/bootseparated together with a partition EFI.
- Although not always necessary, a partition can be used
- Server or Multiboot Environments:
- It is common on servers to separate critical files from the rest of the system.
- It is also useful when multiple operating systems share the same disk.
- BIOS Limitations:
- On older systems with BIOS, the partition
/bootmay be necessary if the root partition (/) is not within the first accessible sectors of the disk.
- On older systems with BIOS, the partition
Recommended size for /boot
The size of /boot It depends on the expected use, but these are the recommendations:
| Use | Recommended Size |
|---|---|
| Standard system | 500 MB |
| Multikernel (various versions) | 1 GB |
| Complex servers | 2 GB |
How to Configure /boot on Debian?
During Manual Installation
- In the partitioner, select free space and create a new partition.
- Recommended size: 500 MB.
- File system: ext4.
- Mount point:
/boot. - Mark the partition to be formatted.
Advantages of Using a Separate /boot Partition
- Security: Keeps boot files isolated from the rest of the system, especially useful on encrypted disks.
- Compatibility: Avoid problems with old BIOS or advanced settings.
- Ease of recovery: Allows you to access the boot files without mounting the rest of the system.

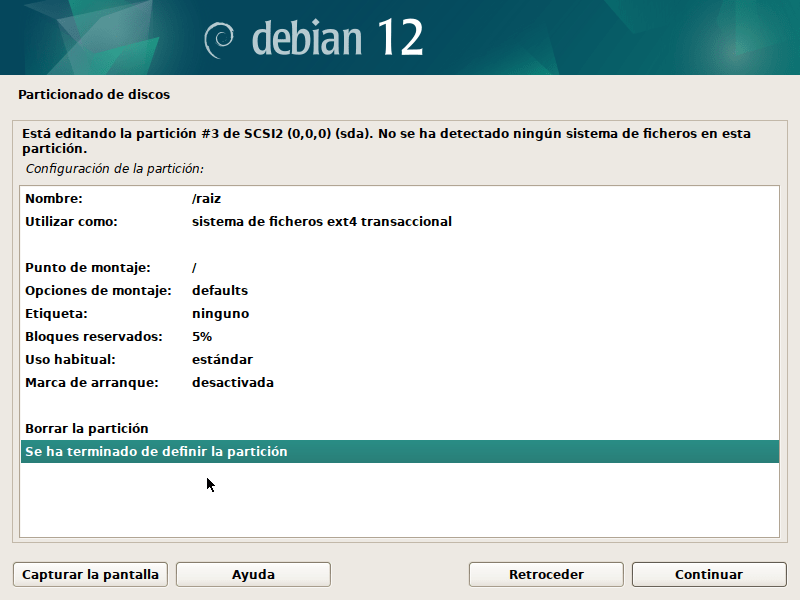
Let's create the system root partition /
The partition root (/) is the foundation of the file system in Linux. It's the starting point from which all other directories and partitions are mounted. It contains the operating system, applications, and all the essential files for Linux to function.
What Does the Root Partition (Contain)?/)?
The root partition includes the main directories of the file system. Some of the most important are:
/bin: Basic system programs, such asls,cp,mv./etc: System configuration files./lib: Libraries needed to run programs on/binand/sbin./usr: User files, installed programs and their libraries./var: Variable files such as logs, temporary databases, etc./tmp: Temporary files.
Other important directories such as /home, /boot, either /srv They can be within the root or on separate partitions, depending on the configuration.
When to Use a Separate Partition for /?
The root partition (/) is generally required and should always be present. In most configurations, it is located on a separate partition, especially in the following situations:
- Systems with multiple partitions:
- They are usually separated
/home,/vareither/bootfor better system control.
- They are usually separated
- Using encryption or LVM:
- The root partition is mounted before the others and may be necessary for systems with encrypted disks or advanced configurations.
- Simpler systems:
- If you don't have many specific needs, you can use a single partition where everything is contained in
/.
- If you don't have many specific needs, you can use a single partition where everything is contained in
Recommended Partition Size /
The size of the root partition depends on the use you plan to give to the system:
| Type of Use | Recommended Size |
|---|---|
| Basic system or light server | 20-25 GB |
| General use (average user) | 30-50 GB |
| Development or large servers | 50-100 GB |
Note: If you separate other partitions like /home either /var, you can reduce the size of /.
How to Set Up Partition / in Debian
During the Debian installation:
- Select free disk space.
- Create a new partition:
- Size: According to your needs (e.g., 100 GB).
- Partition type: Primary.
- File system: ext4 (or whichever you prefer as
btrfseitherxfs). - Assign the mount point:
/. - Save changes and continue.
What Happens if There Is No Partition /?
Without a root partition (/), the Linux system cannot boot, as it contains all the essential components to initialize the operating system.
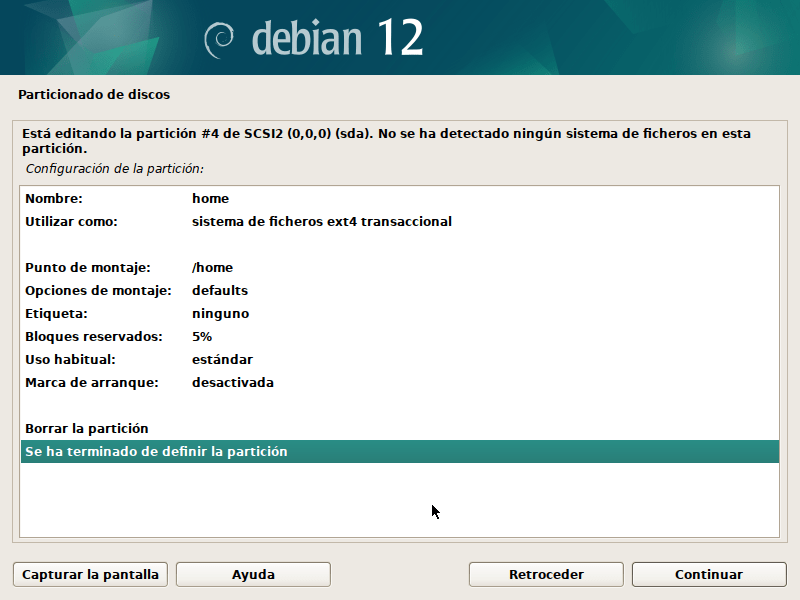
Let's create the /home partition
The partition /home This is where users' personal files are stored. Each user has their own directory within /home, which contains specific settings for your applications, documents, downloads, and other personal data.
Why Create a Separate Partition for /home?
Separate /home in its own partition has several advantages:
- Preserve User Data:
- If you need to reinstall the operating system, you can format the root partition (
/) without affecting the data stored in/home.
- If you need to reinstall the operating system, you can format the root partition (
- Better Space Management:
- Facilitates the allocation of space between system data and personal data.
- Security:
- You can apply different permissions and encryption settings to the partition only.
/home.
- You can apply different permissions and encryption settings to the partition only.
- Flexibility:
- In multi-user environments, each user has their own independent space.
Recommended Size for the /home Partition
The size of /home It depends on how you use your computer:
| User Type | Recommended Size |
|---|---|
| Basic user (browsing, office) | 50-100 GB |
| Average user (multimedia, development) | 200-500 GB |
| Advanced user (large files, games) | Rest of the album |
Note: If you plan to store many large files like videos or projects, allocate more space.
How to Configure /home in Debian
- During Installation:
- Select free disk space.
- Create a new partition:
- Size: According to your needs.
- Partition type: Primary either Logic.
- Assign the file system: ext4.
- Mount point:
/home. - Save changes.
Advantages of Separating /home
- Ease of Update: You can upgrade or change the operating system without deleting your files.
- Organization: Maintains system data (
/) separated from user data. - Back: It is easier to make specific backups of
/home.
Is a Separate /home Partition Mandatory?
No. If you do not create a separate partition for /home, your data will be stored inside the root partition (/). However, separating them is a good practice, especially on desktop systems or when handling large volumes of data.
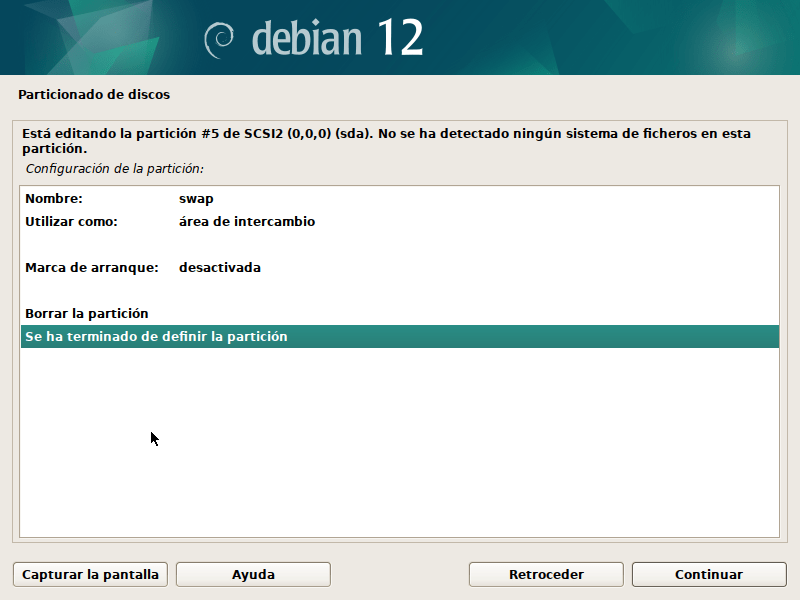
Let's create the swap area partition Swap
The swap partition It is a reserved space on the disk that acts as virtual memory. It is used when the system's RAM becomes full, providing a backup area so the system doesn't run out of memory.
Swap Partition Functions
- Expand RAM Memory:
- Allows the system to run temporarily even if the RAM is full.
- Hibernation:
- During hibernation, the contents of RAM are saved to the swap partition, so the swap size must be at least equal to the RAM size for this feature to work.
- Avoid Memory Problems:
- Swap is used as a last resort to prevent “out of memory” errors in applications.
How Much Space to Allocate to Swap?
The recommended swap partition size depends on how much RAM you have and how you plan to use your system:
| RAM in the System | Normal Use | Hibernation |
|---|---|---|
| Less than 2 GB | Equal to the size of the RAM | Equal to the size of the RAM |
| 2-8 GB | 1-2 times the RAM | Equal to the size of the RAM |
| More than 8 GB | 4-8 GB | Equal to the size of the RAM |
Grades:
- On systems with a lot of RAM (16GB or more), swap usage may be minimal, but it's good to have a small partition for emergencies.
- If you don't use hibernation, a smaller swap partition is usually sufficient.
Swap Types
- Swap Partition:
- It's set up as a dedicated partition on the disk. It's reliable and easy to configure during installation.
- Swap File:
- Swap can also be implemented as a file within the file system. This method is flexible, as you can resize it without modifying disk partitions.
How to Configure Swap on Debian
During Installation:
- Select free disk space.
- Create a new partition.
- Size: As recommended.
- Partition type: Primary either Logic.
- Configure partition usage:
- File system: Swap area.
- Save changes.
Post-installation (optional):
If you need to add swap after installation, you can:
- Create a swap file.
- Or use a tool like
gpartedto add a swap partition.
Checking Swap Usage
After configuration, you can check if swap is active with the command:
$ swapon --show
Or to see a summary of memory and swap:
$ free -h
Advantages and Disadvantages of Using Swap
| Advantages | Disadvantages |
|---|---|
| Avoid failures due to lack of memory | It is much slower than RAM |
| Allows use of hibernation | Frequent use can reduce the lifespan of SSD drives. |
| Easy setup | On systems with a lot of RAM, swap may be unnecessary. |
The result of hard disk partitioning:
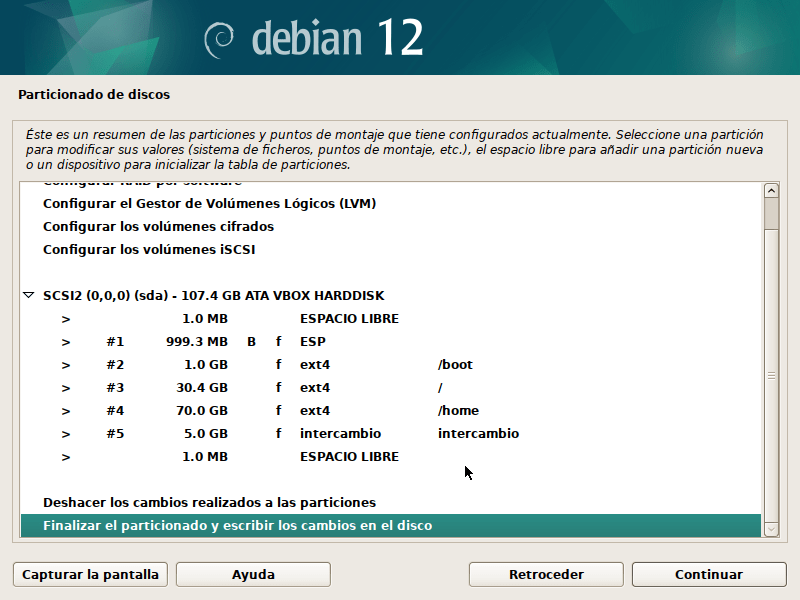
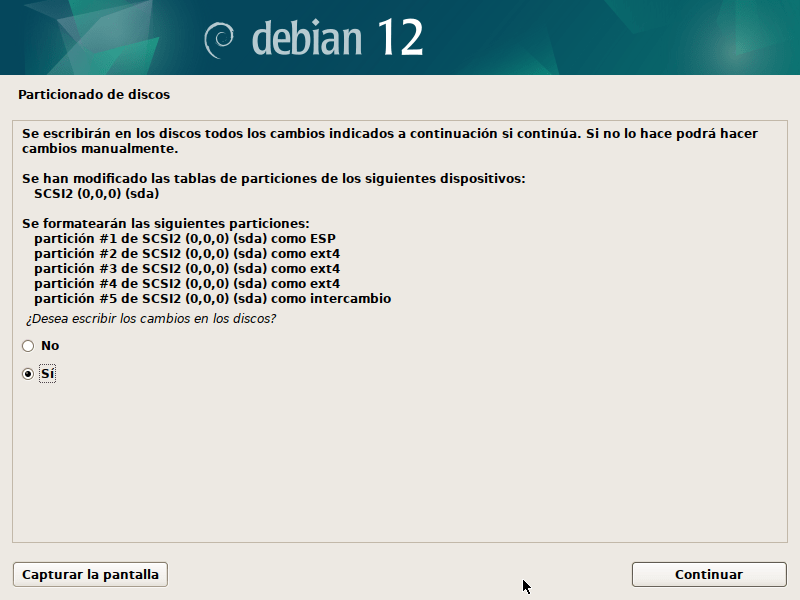
If everything is fine, finish partitioning and write the changes to disk and continue…
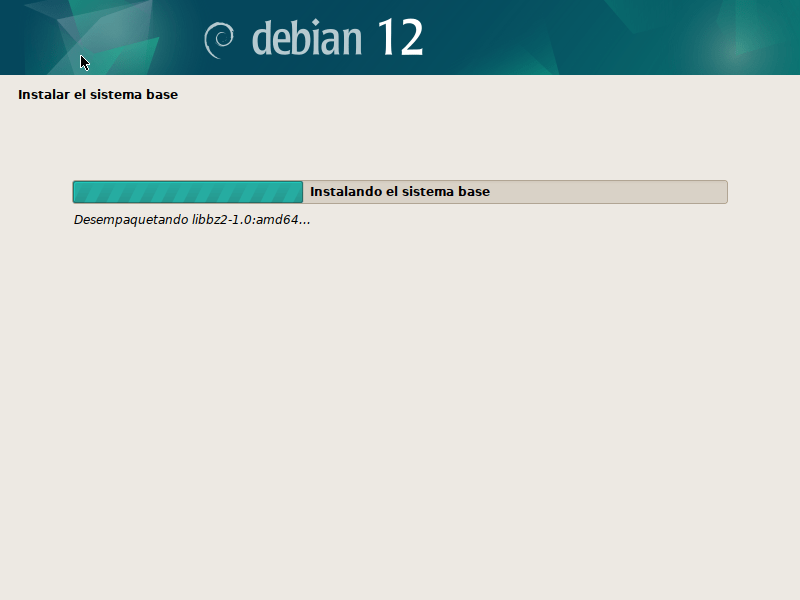
Now the base installation of Debian begins on our computer:
The installer installs the minimum components necessary for the operating system to function. This process includes the system kernel, basic drivers, command-line tools, and essential configurations.
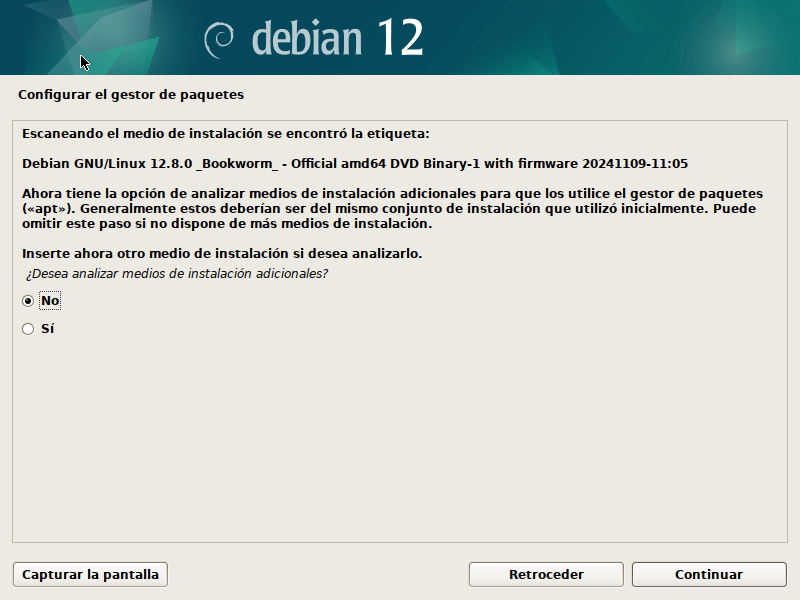
Additional Installation Media in Debian
Debian offers several ways to install the operating system, each designed to meet specific user needs. These methods include ISO downloads, physical media, and network methods.
If you have other official Debian DVD Binary 2 or 3 ISO media, you can insert them if you don't have internet access for a full installation.
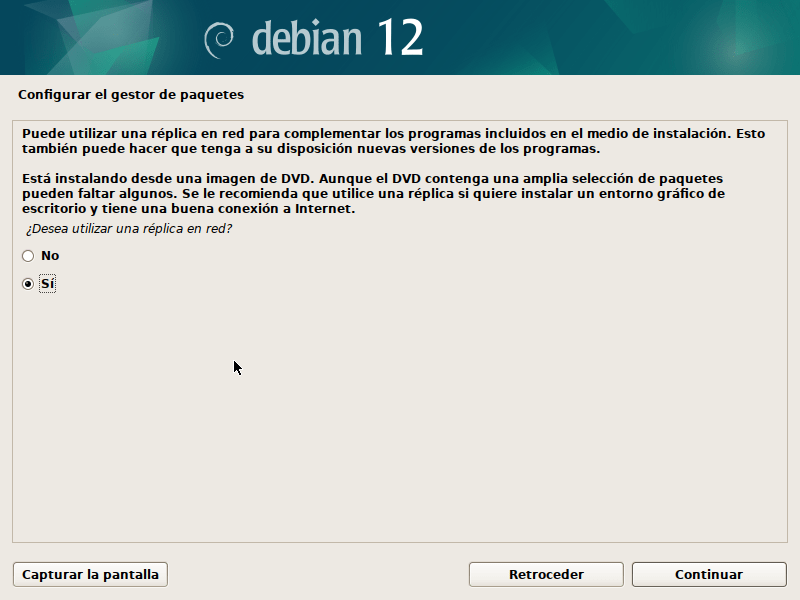
Network Mirroring in the Debian Installer
During the installation of Debian, the installer offers the option to use a network mirrorThis feature allows you to download packages directly from online repositories, ensuring that you install the most up-to-date version of the operating system and its components.
Setting up a network mirror during your Debian installation is a great way to ensure an up-to-date and functional system. It's especially useful when using lightweight installation images or customizing installed software.
What is a Network Replica?
A network mirror is a server that stores official Debian packages. These servers are distributed globally and synchronize their content to provide an up-to-date copy of the packages.
When you select to use a network mirror during installation, the installer:
- Automatically configure repositories on your system.
- Download the necessary packages from the selected server.
- Ensures that the operating system has the latest updates and fixes.
Advantages of Using a Network Replica
- Recent Updates: Downloaded packages are up-to-date, correcting known bugs or vulnerabilities.
- Flexibility: Allows you to install only the necessary packages, reducing disk space used.
- Access to Additional Packages: If you selected a minimal ISO (such as netinstall), you can install additional software from online repositories.
How to Configure Network Replication During Installation
- Choosing the Use of Replica:
During installation, the system will ask:- "Do you want to use a network mirror?"
Select "Yeah" if you have an Internet connection.
- "Do you want to use a network mirror?"
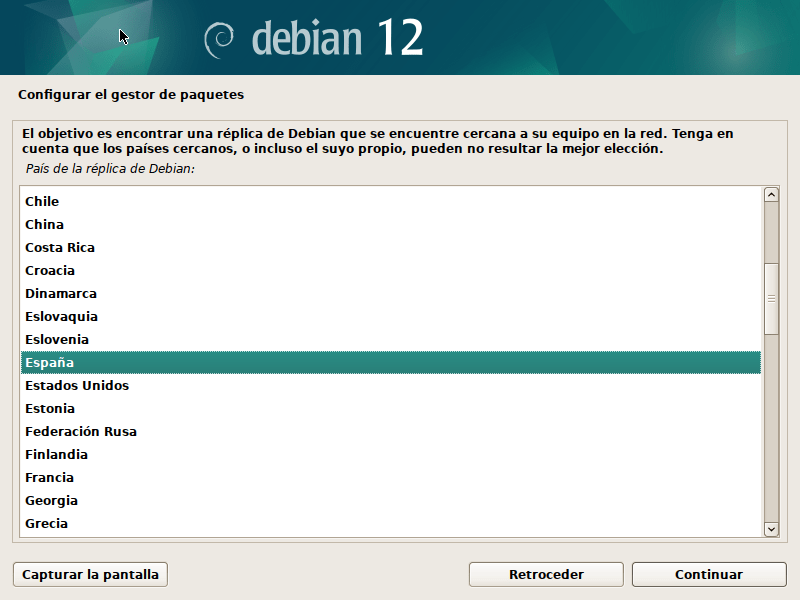
- Mirror Selection:
The installer provides a list of nearby servers based on your location.- Example:
deb.debian.orgor mirrors specific to your country.
- Example:
- Proxy Settings (optional):
If you're behind a proxy, enter the details here.- If you are not using a proxy, leave this field empty.
- Connection Test:
The installer will verify the connection to the selected mirror and download the package list.
What to Do if You Don't Use a Network Replica
- If you choose not to use a mirror, the installer will use the packages included on the installation media (CD, DVD, or USB).
- You can configure the repositories later by editing the file
/etc/apt/sources.list.

Setting Up a Proxy in the Debian Installer
During the Debian installation, the system may request information from a proxy If you need to connect the installer to the Internet through one. This is common in corporate or institutional networks, or in environments where Internet access is restricted and channeled through a proxy server.
What is a Proxy?
A proxy is an intermediary between your system and the server you wish to connect to. In the context of Debian, it's used to:
- Download packages from online repositories.
- Access network mirrors in facilities that require an Internet connection.
When to Set Up a Proxy?
- If you are behind a corporate or institutional network with controlled access.
- If you need to log all outgoing connections for security or auditing reasons.
- If your Internet provider requires the use of a proxy to browse or download data.
How to Configure a Proxy During Installation
- When the Installer Asks for the Proxy:
The installer will display a message like:- "If you need an HTTP proxy to connect to the Internet, enter it here. Otherwise, leave the field blank."

Setting up the Popularity Contest in Debian
popularity-contest, either popcon, is a package in Debian that collects usage statistics about the packages installed on the system. This information is sent to Debian developers to help them prioritize the development and maintenance of the most frequently used packages.
What Is It and Why Set It Up?
- What are you doing?
- Analyze how frequently the packages installed on your system are used.
- Send reports (anonymously) to the Debian project.
- Why Set It Up?
- Help the Debian team identify the most relevant packages.
- It allows you to optimize repositories and ISO image distributions.
- It is optional and completely voluntary.
Configuration During Debian Installation
During installation, the system will ask you if you want to configure the popularity-contest:
- Installer Message:
"Do you want to participate in the popularity contest to help Debian developers?" Options:- Yeah: It will be installed and configured automatically. Reports will be sent periodically.
- No: It won't be installed. You can configure it later if you wish.

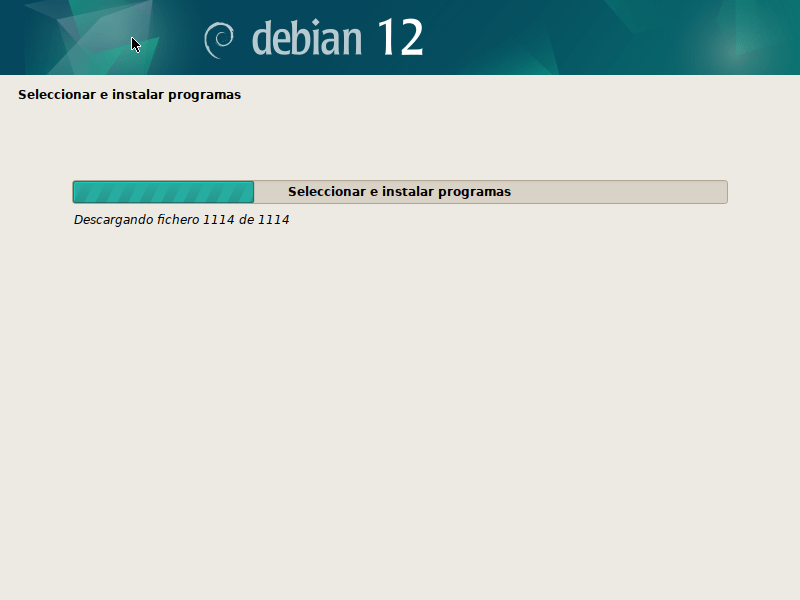
Selecting Programs and Desktop Environments in the Debian Installer
During the Debian installation, the system offers you the option to select programs and desktop environments to install. This step is crucial for customizing the system to your needs, whether for a graphical environment, a server, or specialized use.
Software Options Offered
When you reach the program selection step, the installer will present a list with options such as:
- Debian Desktop Environment (default)
Installs the desktop environment selected as the default for Debian. It is usually GNOME in modern versions. - Alternative Desktop Environments:
- GNOME: Complete and modern. Ideal for users looking for an elegant graphical experience.
- KDE Plasma: Focused on customization and visual effects.
- XFCE: Lightweight and fast, perfect for older or resource-limited systems.
- LXQt: Even lighter than XFCE, ideal for very basic hardware.
- Cinnamon: A modern yet traditional interface, derived from GNOME.
- MATE: A lightweight environment based on GNOME 2, for those who prefer a classic interface.
- LXDE: Ultra lightweight, designed to maximize efficiency on limited hardware.
- Print Server:
- Includes software such as CUPS to manage printers and print jobs.
- Standard System Tools:
- Basic utilities such as text editors, network tools, and file management.
- SSH Server:
- Install OpenSSH to allow remote access to the system.
- Server-Only Environment (no graphical desktop):
- It does not include a graphical environment, ideal for servers where the use of the command line is prioritized.
How to Select Programs
- Selection Screen:
During installation, the installer displays a list of options with check boxes.- Use the keyboard arrows to navigate.
- Press the space bar to select or deselect options.
- Automatic Desktop Selection:
If you do not select a specific desktop, Debian will install its default environment (GNOME). - Advance:
Once you have made your selection, press Enter to proceed.

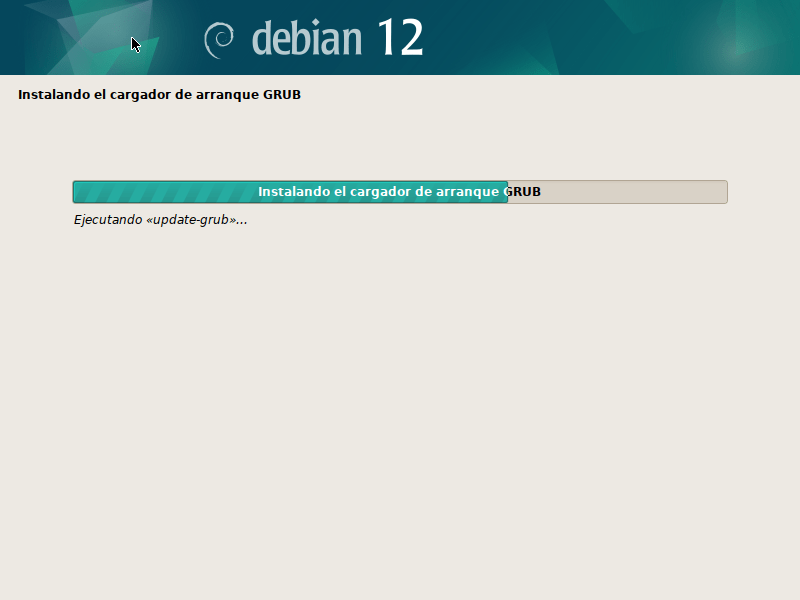
Installing the GRUB Boot Loader on Debian
He GRUB boot loader (Grand Unified Bootloader) is an essential system component that allows you to boot the operating system. During Debian installation, configuring GRUB correctly ensures your machine can boot effectively.
GRUB Installation Process During Debian Installation
- GRUB Selection:
- During the installation process, the installer will ask:
- "Do you want to install the GRUB boot loader to the master boot record (MBR)?"
- Select "Yeah" if you want GRUB to be the primary boot loader.
- During the installation process, the installer will ask:
- Installation Disc:
- The installer will ask you to select the disk where GRUB will be installed.
Example:/dev/sda: Main disk. Avoid selecting specific partitions as/dev/sda1.
- The installer will ask you to select the disk where GRUB will be installed.
- Ending:
- The installer will automatically configure GRUB and install it to the selected disk.

Restart your computer…
Completing the Debian Installation with the XFCE Desktop Environment
Install Debian with XFCE It's an excellent option for users looking for a stable, efficient, and easy-to-use operating system. This process stands out for its flexibility, allowing you to configure the system according to your needs without including unnecessary elements. Below is a summary of the key points:
Advantages of the Installation Process
- Simplicity and Personalization:
- The Debian installer guides you through the process clearly, allowing you to choose essential components and settings such as partitions, networking, and desktop.
- Lightness of the System:
- XFCE as a desktop environment ensures efficient use of system resources, ideal for both older and modern hardware.
- Software Selection:
- Allows you to install only the necessary tools, avoiding additional packages such as servers or services that you don't need.
- Compatibility and Stability:
- Debian, renowned for its robustness, ensures that XFCE runs smoothly, providing a reliable system for everyday use.
- Suitable for all types of users:
- From beginners looking for simplicity to advanced users requiring full control over their settings.
What Makes Debian + XFCE Special
- Easy to Customize:
- From appearance (themes and icons) to desktop behavior, XFCE lets you fine-tune the environment to your preferences.
- Optimal Performance:
- Thanks to the efficiency of XFCE, the system remains fast and agile, even with multiple applications open.
- Minimalist System:
- By installing Debian without additional servers or services, you have a clean installation ready to optimize to your needs.
Why Choose Debian with XFCE?
If you value stability, lightness, and a hassle-free experience, Debian with XFCE is a perfect choice. It offers the solid Debian foundation with a graphical environment that combines functionality and simplicity, adapting to a wide variety of use cases.

Descubre más desde javiercachon.com
Subscribe to get the latest posts sent to your email.